Low FODMAP Seattle-Style Teriyaki Chicken

A photo of teriyaki, rice and salad on a white plate.

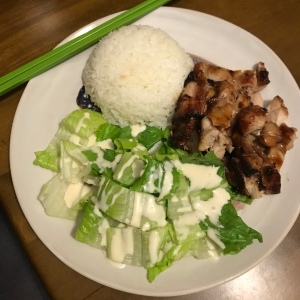
Seattle is blessed with its own signature style of teriyaki. You can find teriyaki restaurants in great abundance throughout the region. This style of teriyaki differs from true Japanese teriyaki in that it is made without apples, which are high in FODMAPs. That makes it easier to adapt to a low FODMAP diet.

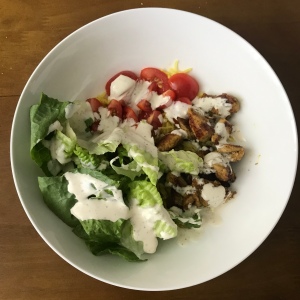
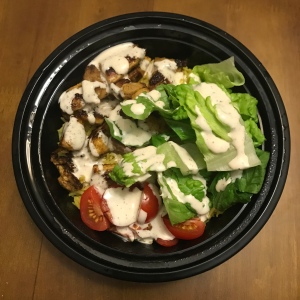
Pair with fresh hot rice and salad for a complete meal. Teriyaki places usually serve salads with either a tangy poppyseed dressing or a mayo-sesame Japanese-style dressing (my favorite). Find recipes for both in my Asian salad dressing recipes.

Please keep an eye on your shoyu (soy sauce) intake. There are 3 teaspoons of soy sauce per thigh. Monash says that up to 2 tablespoons of soy sauce is tolerated by most.


Low FODMAP Seattle-Style Teriyaki Chicken

Makes 4 servings.

Ingredients

  • 1 lb boneless skinless chicken thighs
  • 1/3 cup shoyu (Japanese soy sauce)
  • 3 tbsp cane sugar
  • 2 tbsp mirin
  • 1 tbsp garlic-infused olive oil
  • 1 (1”) piece ginger, peeled and thinly sliced
  • hot cooked jasmine rice or Japanese short grain rice for serving
  • up to 2 cups chopped romaine lettuce

Instructions: Teriyaki Sauce

  1. Bring soy sauce, sugar and mirin to a boil in a small sauce pan over medium high heat, stirring to dissolve the sugar. Remove from heat and allow to cool completely.

Instructions: Marinade

  1. Prepare the marinade by combining 1/4 cup of above teriyaki sauce along with the garlic-infused olive oil and ginger in a blender and process until smooth, about 20 seconds. Reserve the remaining teriyaki sauce for serving.
  2. Add chicken and marinade to a covered dish and marinate 1-24hrs.

Instructions: Broil the Chicken

  1. Prepare oven for broiling by positioning the rack so the meat will be 4-6” from the heating element. (It can be further away – up to 8 inches – but you must increase the cooking time.) Broil ~10 minutes on one side only, so that a nice char develops and the chicken is at least 165F throughout.
  2. Remove the chicken to a cutting board. Cut into 1″ strips.
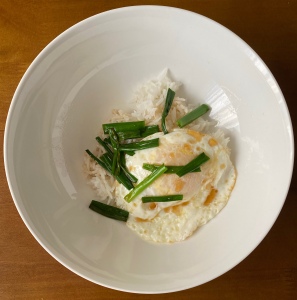
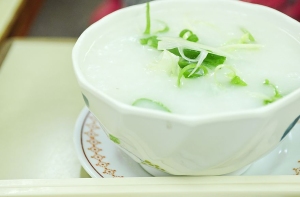
  3. Serve on a plate with hot white rice and a salad. Pour reserved teriyaki sauce over the chicken OR serve it on the side.

Low FODMAP Keema Rice

Keema means mincemeat and it most commonly refers to ground beef or lamb that has been cooked with South Asian spices. Different regions and ethnic groups all have their own versions. It can be eaten on its own or as part of other dishes. For this recipe, keema is combined with cooked basmati rice and vegetables for an easy, flavorful meal that takes under 20 minutes.

Any ground meat will work for this recipe – chicken, turkey, lamb, beef. It’s all tasty. I use 1/3 lb beef hamburger patties (thawed) since they are convenient. Tomatoes and carrots are delicious in this dish, but you can add other low FODMAP veggies you like. If you don’t like cilantro, use fresh mint or flat leaf parsley instead. This dish is mildly spicy if using green chilis. If you do not tolerate them, feel free to leave them out.

Please note that chili powder usually contains small quantities of garlic and onion. Low FODMAPers can keep portion sizes very small, replace the chili powder with paprika, or use chili powder that does not contain garlic and onion. You can find brands that do not contain garlic/onions by searching online. Garam masala may or may not contain garlic. Be sure to use a garlic free version.

A photo of keema rice on a white plate.

Use basmati rice for best texture and flavor. Jasmine rice can work in a pinch. (Do not use short grain rice as it is too sticky.) Use cold rice. I recommend making rice in the morning or the night before and refrigerating it until you are ready to cook dinner. Be sure to break up any lumps in the rice before adding it to the pan. Use a large skillet or wok and cook in batches. 3 cups of cooked rice is about the most rice you’ll want to manage in the pan at a time.


Makes 3 servings

Keema Rice Ingredients

  • 1/3-1/2 lb ground beef or lamb
  • 3 cups cold cooked basmati rice
  • 2 medium carrots, peeled and diced
  • 1 leek, sliced (green parts only)
  • 2 med tomatoes, chopped
  • 2 tsp pulverized or grated fresh ginger
  • 2-3 tbsp garlic-infused olive oil
  • 1-2 green chilis (bird’s eye or jalapeño recommended) cut into thin slices (optional, if tolerated)
  • fresh cilantro, chopped
  • 1 tsp chili powder (optional, if tolerated – see above)
  • 1 tsp turmeric
  • 1 tsp low FODMAP garam masala
  • ½ tsp coriander
  • 1 tsp cumin
  • ½ tsp black pepper
  • ½ tsp sea salt

Keema Rice Instructions

  1. Heat a large cast iron skillet over medium-high heat. Add garlic infused oil. When it shimmers, add the carrots. Cook for about 2 minutes. Add leek and cook for another 1-2 minutes.
  2. Add the green chilli and ground meat to the pan. Break meat into small pieces and fry for 2-3 minutes until the meat is lightly browned.
  3. Add chilli powder, turmeric, garam masala, cumin seeds, coriander, black pepper, and salt. Add the ginger. Mix well. Stir in the tomatoes and cook until they are slightly soft.
  4. Add the cold cooked rice and combine well with all other ingredients. Continue to stir fry over medium-high for another 2-3 minutes, until heated through. Remove from heat, transfer to serving plate and top with chopped cilantro.

Making Basmati Rice in a Rice Cooker

Making rice ahead of time is a real time saver. Sometimes I will cook the rice for Keema Rice while making dinner the night before. Though Keema Rice is absolutely delicious when made with plain buttered basmati rice, you can pack even more flavor into this dish by adding broth concentrate and a few spices to the rice cooker.

Makes ~3 cups cooked rice.

Instructions

  1. Rinse the rice in several changes of water. Drain. Ideally the rice should be fairly wet when it goes into the rice cooker. Add the water.
  2. Chop the butter into small bits (or melt it) and stir into the rice. Add spices and broth concentrate if using. Stir well and start rice cooker.
  3. Allow rice cooker cycle to run and let stand for about ten minutes before opening. Fluff with rice paddle or spatula. Allow rice to cool a bit then refrigerate until ready to be used in Keema Rice.

Low FODMAP Street Cart Chicken with Rice

A photo of a white bowl filled with yellow rice, cooked chicken, tomatoes and lettuce

One of New York’s favorite street foods is chicken over yellow rice with salad served from a Halal cart. Chicken thighs marinated in an irresistible blend of spices are grilled and then served atop yellow rice with lettuce and tomatoes. A tangy white sauce is drizzled over everything. This low FODMAP version captures all the flavor of the original but without onions or garlic.

This recipe seems like a lot of steps, but it’s really very easy. It does take a bit of planning as the chicken should ideally marinate for 3 hours and the sauce needs to sit for at least 30 minutes before serving. Basmati rice takes about 1-1/3 cup of water per cup of uncooked rice, but I have found that simply using very soggy rice after rinsing and adding 1 cup of broth is sufficient. A 1/2 teaspoon of pepper may seem like a typo, but the sauce is flavored exclusively with black pepper so use a LOT. Fresh ground will taste better. Double the amount if using pre-ground pepper. If you don’t have garlic-infused olive oil, make it with regular olive oil. There’s plenty of flavor from the spices to interest your tastebuds.


Makes ~2 servings.

Marinated Chicken Ingredients

  • 1 pound boneless, skinless chicken thighs, cut into bite-sized pieces
  • ~ 3 tbsp fresh lemon juice (1 large lemon)
  • 2 tbsp garlic-infused olive oil
  • 1/2 tsp paprika
  • 1/2 tsp ground cumin
  • 1/2 tsp ground coriander
  • 1/4 tsp ground allspice
  • 1/4 tsp turmeric
  • 1/4 tsp sea salt
  • 1/8 tsp black pepper

Marinated Chicken Instructions

  1. Combine lemon juice, olive oil, paprika, cumin, coriander, allspice, turmeric, salt and pepper in a large bowl. Add the chicken and stir until evenly coated in the marinade. Cover and refrigerate for at least 30 minutes and up to 12 hours.
  2. Heat a large cast iron skillet over medium high heat. Working in batches to prevent crowding the pan, add chicken pieces in a single layer and cook undisturbed for ~4 minutes, until browned. Stir and continue to cook until fully cooked – 3-4 minutes. Transfer to a plate. Repeat with any remaining chicken.

Yellow Rice Ingredients

Yellow Rice Instructions

  1. Rinse the rice in several changes of water. Drain. Ideally the rice should be fairly wet when it goes into the rice cooker.
  2. Add the rest of the ingredients the rice cooker, stir well. Follow the directions for your rice cooker. Makes 2.75-3 cups cooked rice.

Sauce & Salad Ingredients

  • 2/3 cup of real mayonnaise
  • 2 tbsp of water
  • 1/2 tsp ground black pepper (use 1 tsp if not freshly ground)
  • 1/4 tsp ground sumac (optional)
  • 4-5 leaves Romaine lettuce, chopped
  • 6-8 grape tomatoes, halved

Sauce, Salad & Serving Instructions

  1. Combine the mayonnaise, water, sumac and pepper in a small bowl and stir until smooth. Allow to rest for 30 minutes. Stir well before serving. If necessary, thin the sauce with a small amount of water.
  2. Mound rice on plates. Pile a serving of chicken on top of the rice. Divide the lettuce and tomato between the plates. Drizzle with sauce.
A photo of a to-go container filled with Street Cart Chicken with Rice

Eggs with Soy Sauce, Scallions & Rice

A photo of eggs with soy sauce scallions and rice in a bowl

This simple dish is surprisingly tasty for how quickly it comes together. It takes just about 5 minutes from start to finish when you have leftover rice to use up. Lightly sweet soy sauce is poured over eggs, scallions and rice, creating a satisfying meal. If you’re a fan of runny yolks, this is an excellent way to enjoy them. Enjoy this dish for breakfast, lunch or dinner.


Makes 1 serving.

Ingredients

  • 2 scallions, cut into 2” segments, green parts only
  • 1 tbsp avocado oil
  • 2 eggs
  • 1 tbsp soy sauce
  • 2 tbsp water
  • 1/4 tsp sugar
  • 1 cup hot jasmine rice or other cooked white rice

Instructions

  1. Heat the oil in a small nonstick or cast iron pan over medium heat. Fry the eggs sunny-side up, over easy, or however you like them. Lay the eggs over a bed of hot cooked rice.
  2. Add the scallions to the pan, and cook until just beginning to wilt. Add the soy sauce, water, and sugar. Simmer for 30 seconds, then pour over the eggs and rice. Serve immediately.

Low FODMAP GF Japanese Curry Rice

A top down photo of curry rice in a white bowl

Japanese curry rice or karē raisu is a yōshoku (western food) dish that arrived via the British during the Meiji Era. It became popular in the early 20th century after the Japanese Navy and Army included “Navy Curry” on its menus. Curry rice is most often meat, onions, carrots and potatoes in a mild curry gravy, but lots of variations exist.

Today curry rice is ubiquitous in Japan. Home cooks and restaurants alike overwhelming use pre-made curry roux cubes, which are made with wheat flour, fat and curry powder. The few who don’t use roux cubes use S&B Oriental Curry Powder to make their own curry roux. Because of the identical beginnings of the dish, Japanese cooks tend to add 1-2 other ‘secret’ ingredients to their curries to personalize them. Ketchup, paprika, garam masala, sugar and even cocoa powder make their way into curry rice recipes.

For my version I used my own low FODMAP curry blend since S&B Oriental Curry Powder contains garlic. I am also sensitive to capsaicin (found in paprika, cayenne and chili powder) so I can leave those things out when I make my own. Typically this curry isn’t very spicy, but feel free to customize yours. Normally yellow onions figure prominently in curry rice, but they’re a no-no for low FODMAP. Instead I opted to include cabbage, which is an occasional ingredient in curry rice, to provide some texture.

If you are using garam masala, be sure it is low FODMAP. Ginger paste is simply pulverized fresh ginger. You can use a food processor to make it or you can finely chop it then use mortar and pestle to mash it with a pinch of salt.


Makes 2 servings.

Ingredients

  • 1/2 lb chicken thighs, cubed
  • 1 Yukon gold potato, 1/2” dice
  • 1 med carrot, angle sliced
  • 1/4 cup chopped scallions, green parts only
  • 3 leaves of cabbage, chopped (optional)
  • ½ tsp grated ginger/ginger paste
  • 1 cup low FODMAP chicken broth
  • 3 tbsp sweet rice flour
  • 1 tbsp avocado oil
  • 1 tbsp unsalted butter
  • 1 tbsp low FODMAP curry powder
  • 1 tsp low FODMAP garam masala (optional)
  • ½ tsp paprika (optional)
  • freshly cooked jasmine rice

Instructions

1. Heat a cast iron skillet over medium high heat. Add butter and oil. Add the chicken pieces and sauté for a few seconds. Add the ginger and stir well.

2. Add the potatoes, cabbage and carrots to the pan. Sprinkle with curry powder, garam masala and paprika. Mix well. Sauté for 3-4 min.

3. Add the scallions. Sprinkle the rice flour over the mixture and mix until everything is evenly coated. Allow to cook for about 3 minutes, then add the broth slowly. Stir well.

4. Continue cooking until the gravy thickens – about 3-4 minutes, stirring occasionally – until the vegetables are tender. Add a bit more water if needed. Serve with steamed Japanese rice or Jasmine rice.

Low FODMAP GF Hawaiian Loco Moco

A photo of a white bowl filled with low FODMAP gravy, rice and hamburger topped with a fried egg on a white background

The year is 1949. A group of teenagers enters the Lincoln Grill in the Hawaiian town of Hilo and asks for an inexpensive meal. Thus is born the Loco Moco – a hamburger patty on a bed of rice, smothered in gravy. Within a few years, the dish was popular all over Hawaii and spawned many variations, including a version with a fried egg on top.

These days Loco Moco is found throughout Hawaii and is also enjoyed in Japan and the US mainland. Most commonly it’s made with Japanese short grain rice, but I prefer to use jasmine rice. Despite originally being conceived as a lunch dish, Loco Moco is popular at any time of day.


Makes 1 serving.

Ingredients

  • 1 frozen hamburger patty
  • 1 egg
  • 1 tablespoon unsalted butter
  • 1 tablespoon sweet rice flour
  • 1 tbsp oil
  • 1 cup water
  • 1 low FODMAP beef broth stick
  • 3 tsp shoyu (Japanese soy sauce)
  • 1/2 tsp Worcestershire sauce
  • 1 tsp low FODMAP ketchup
  • black pepper and sea salt
  • 1 scallion, green parts only, sliced
  • 1 cup cooked rice

Instructions

  1. Patty: Cook hamburger patty according to directions on box. Season lightly with salt and pepper.
  2. Gravy: In a small pot, melt the butter over medium-high heat. Add the sweet rice flour and whisk until a paste forms. Continue whisking until the roux turns light beige, about 3 minutes.
  3. Combine broth stick and water in a measuring cup and stir. Add shoyu, Worcestershire sauce and ketchup and mix well. In a slow and steady stream, whisk the broth mixture into the roux. Add a few grinds of black pepper. Continue to whisk until gravy has thickened and begins to bubble. If it becomes too thick, add a little water.
  4. Sunny Side Up Egg: Heat a small skillet on medium-low. Add oil and gently crack an egg into the pan. Cook for 3 minutes or until the whites are mostly set, with some still-runny whites near the yolks. Place a lid over the pan for a few seconds to set the whites if necessary. Be careful not to keep the lid on for too long or the yolk will cook, too.
  5. Assembly: Mound the rice on a plate or in a bowl. Place the cooked burger on the rice. Smother with the gravy. Lay the fried egg on top and garnish with some scallions.

Low FODMAP Avgolemono Soup

This simple egg, lemon and rice soup is mild and comforting. It’s also gentle on the stomach. Avgolemono has its roots in Sephardic Jewish cooking despite being considered a Greek dish. It varies greatly in the way it is prepared. Some versions are heartier, others more silky and light. This version leans towards the thinner side. It takes around 25 minutes total. It’s great for a quick lunch or even breakfast.

Avgolemono soup being ladled into a bowl.

Typically plain avgolemono soup is served as a side dish in Greek restaurants. It can be made into a more complete meal by adding meat, herbs and vegetables. Shredded poached chicken is a popular addition. Poach a chicken breast in the broth before using it to make this soup. Remove the chicken when it is done and set aside to cool while you prepare the soup. Add the shredded chicken just before serving.

Avgolemono can be made with all kinds of vegetables, but carrots seem to go especially well with it. I prefer to use escarole myself. Add chopped escarole after 15 minutes, about 5 minutes before adding the egg mixture.

Sumac is a tart, lemony spice commonly used in Mediterranean cooking. A light sprinkle will add color and a little punch. Fresh herbs can also provide color and flavor. Parsley, chives and dill are the most popular. Stir them in after removing from heat or top individual bowls with a small amount herbs.


Makes 4 servings.

Ingredients

  • 4 cups low-FODMAP chicken broth
  • 1/4 cup uncooked rice
  • 3 eggs
  • 3 tablespoons lemon juice
  • 1 boneless skinless chicken breast, poached (optional)
  • 2 cups chopped escarole (optional)
  • ground sumac (optional)
  • chopped fresh herbs such as parsley, chives, or dill (optional)

Instructions

  1. In a medium saucepan, bring the broth to a boil.
  2. Add rice and cook until tender but still al dente, about 20 minutes. Reduce heat to low and bring to a simmer.
  3. Meanwhile, whisk the eggs and lemon juice together in a bowl until smooth.
  4. Ladle about 1 cup of the hot broth into the egg-and-lemon mixture, then whisk to combine.
  5. Add the mixture back to the simmering saucepan. Stir just until the soup becomes opaque and thickens as the eggs cook, 1 to 2 minutes. Sprinkle with sumac and herbs if desired, and serve.

Low FODMAP Cantonese-Style Chicken Congee

Congee (also called jook) is a type of rice porridge that can be found throughout Asia. Each cuisine has its own style and toppings. Some congee is very thick while other congee is more like soup. I tend to prefer Hong Kong style congee, which is neither thick nor thin, and comes with a variety of topping choices ranging from savory Chinese donuts to fish balls to preserved egg.

A photo of a bowl of congee with scallions sitting on a table

This long-cooking version is made with chicken thighs, ginger and lettuce. If you prefer to use chicken breast, do so. The marinade provides some of the flavoring for the porridge itself. The amount coating the chicken should be plenty, but you may include all of it if you desire. (Just make sure any marinade is thoroughly cooked before serving.) This recipe allows for one thigh per serving, which is a substantial portion. If serving as a side dish or you want something lighter, you may halve the amount of chicken used.

Please note that oyster sauce is not a low FODMAP ingredient. However the amount in the final dish per serving comes to under 1 teaspoon. According to Monash University, up to 1 tablespoon is typically tolerated.

Cantonese folks typically enjoy congee for breakfast or lunch, but it is popular any time of day. Dim sum restaurants usually offer small bowls to accompany the meal. Congee is frequently prepared for people who are sick. It is a favorite comfort food, much like chicken noodle soup in the West.


Makes 4 servings.

Marinated Chicken Ingredients

  • 1 lb boneless skinless chicken thighs
  • 3 tablespoons water
  • 1 tablespoon oyster sauce
  • 2 teaspoons cornstarch
  • 1 teaspoon vegetable oil

Marinated Chicken Instructions

  1. First, slice chicken into 1 ½ to 2 inch pieces, about ¼ inch thick. Remember to slice across the grain, especially if using chicken breast.
  2. Add the water and oyster sauce to the chicken in a medium bowl. Add the cornstarch and vegetable oil and mix until everything is incorporated and the chicken is uniformly coated. For the best results, let the chicken sit for 15 to 20 minutes to marinate.

Congee Ingredients

  • 1 cup jasmine rice, well rinsed
  • 12 cups water
  • 1 chicken broth stick or bouillon cube
  • 2 slices fresh ginger
  • white pepper
  • 2 scallions, green parts only, sliced
  • 1 lb marinated raw chicken (instructions above)
  • Shredded romaine lettuce

Congee Instructions

  1. Add rice, water and broth stick to the pot. Bring to a boil. Stir frequently as it heats to keep rice from sticking to the bottom. Reduce heat and simmer for ~90 minutes, stirring occasionally. Add more water as necessary. (I typically add about 2 more cups of water.) Make your congee whatever consistency you wish. Stir occasionally to keep it from sticking. This becomes more important as it cooks down. You may also need to adjust the heat to keep at a simmer.
  2. Prepare the marinated chicken according to the directions above at least 15-20 minutes before the congee is done cooking.
  3. About 5 minutes before the congee is finished cooking, very thinly julienne the ginger then add it to the pot. (Don’t prepare this ahead of time as we want the flavor of freshly cut ginger.) Add raw chicken and stir well. Allow to cook for about 4-5 minutes or until chicken is done.
  4. Ladle into individual bowls. Top with shredded lettuce, some green onions and a sprinkle of white pepper.

Simply Perfect Jasmine Rice

A photo of an inexpensive rice cooker on a white background

I cook a lot of south, east and southeast Asian recipes. It’s often easy to modify them to be low FODMAP and they are most commonly eaten with rice. Making perfect rice can be as easy as using a nice rice cooker, however the nice ones take up a fair bit of space and they can be expensive. It’s possible to get fantastic results from the small, cheap rice cookers (like the one above). I’ll show you how.


Makes ~2 servings.

Ingredients

  • 1 cup jasmine rice
  • 1 cup water

Instructions

A photo of rice being rinsed in a Japanese rinsing bowl
  1. Begin by rinsing the rice. This is very important. Rinsing rice removes extra starch plus any dirt or nasty stuff. Use cool water and agitate in in a bowl with your hand. Alternatively you can use a rice washing bowl similar to this one. Keep rinsing until the water is nearly clear. Drain well.
  2. Transfer the rinsed rice to the rice cooker. Add the water. Allow the rice to soak for a minimum of 30 minutes and a maximum of 1 hour.
  3. Turn the rice cooker on. The cycle should take about 20 minutes. Allow the rice to rest with the lid on for another 10 minutes after cooking has stopped.
  4. Fluff the rice and it’s ready to eat!