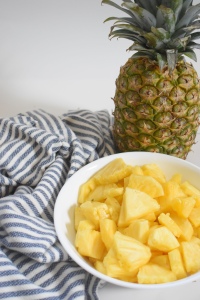
This light and refreshing rice pudding makes a great ending to a low FODMAP meal. When made with leftover rice, it comes together very quickly and easily. You can, of course, make rice just for this recipe. Use 1/3 cup uncooked rice to get 1 cup cooked. Just make sure the cooked rice is thoroughly chilled before using.
As odd as it sounds, heavy whipping cream is low FODMAP. This is because of the high percentage of milk fat and low percentage of lactose. Dairy 30% milk fat and above is low FODMAP. In the US, whipping cream is usually around 30% milk fat and heavy whipping cream is around 36% milk fat.
Low FODMAP Pineapple Rice Pudding
Makes 4 servings
Ingredients
1 cup leftover jasmine or basmati rice, chilled
1 ½ cups heavy whipping cream
⅓ cup cane sugar
1 8oz can crushed pineapple, drained
Directions
In a small mixing bowl, whip the cream, adding sugar gradually until the cream becomes fluffy.
Fold the whipped cream and drained pineapple into the rice. Spoon the mixture into dessert dishes and serve.
This simple, earthy soup is easily made with pantry ingredients and takes about ten minutes start to finish. It’s a perfectly serviceable and easy meal in its most basic form for those low spoon days, but the beauty of this recipe is its modular nature. Adding fresh ingredients boosts both flavor and nutrition if you can manage the effort. This soup makes an excellent meal-for-one option.
You can customize this soup with a variety of proteins and vegetables based on your preferences or what you have on hand. Recommended veggie and protein options and how to prepare them follow the recipe. Select 1-3 vegetables and 1-2 proteins for the best results. Alternatively, substitute a suitable frozen low FODMAP vegetable medley for fresh veggies.
When serving this soup, I do so Asian style by providing both chopsticks and a ceramic spoon. Personally I am comfortable using chopsticks in my dominant hand while using the spoon in the other. If you find it’s tough to eat this way, you can break or cut the noodles into smaller lengths so it can be eaten with just a spoon. Be careful when breaking noodles by hand as they can cut you. Break a small number noodles at a time. Alternatively you can use cooking shears to carefully cut the noodles once they’ve softened in the boiling water.
A bowl of noodle soup with shrimp, boiled eggs, bok choy and scallions. Just needs sesame seeds.
Combine water and broth in a small saucepan. Bring to a boil. Add noodles and cook until tender, 4-6 minutes (see noodle packaging). Stir occasionally to keep noodles from sticking.
Add chosen vegetables and proteins when recommended. (See below).
When the noodles are fully cooked, remove the saucepan from heat and add sesame oil, garlic-infused oil and tamari. Stir well. Ladle soup into a large bowl. Top with sesame seeds, a pinch of white pepper, and any other garnish you’re using.
Veggie Options
If you have other fresh or frozen vegetables on hand, these are some that work well with the flavors of this soup.
Romaine Lettuce – Romaine lettuce holds up great in a hot soup. It doesn’t get mushy or slimy and provides a little crunch and freshness as well as nutrition. Slice a large leaf into thin strips that cross the rib. Top soup with them just before serving.
Baby Bok Choy – According to Monash up to one cup of bok Choy is tolerated by most. Quarter 2 baby bok choy and add them in the last 1 minute to 30 seconds of cooking.
Broccoli Florets – According to Monash up to 3/4 cup is tolerated by most. Use fresh or frozen. Add in the last minute of cooking for tender crisp doneness. Add a minute earlier if you prefer more tender broccoli.
Julienned Carrots – Add julienned carrots in the last 3-4 minutes of cooking. If julienning the carrots is too much work, try using a vegetable peeler to make thin strips. Toss the strips in when there’s just one minute of cooking left. Monash recommends limiting carrots to 1/2 of a medium carrot.
Fresh Spinach – Add a handful or two of spinach leaves just before removing from heat. Stir in.
Scallions – Slice one scallion into rings (green parts only). Top soup with them just before serving.
Protein Options
Shredded or Cubed Cooked Chicken – add in the last 1-2 minutes of cooking. Rotisserie chicken works great.
Thinly Sliced Steak – add in the last 1-2 minutes of cooking. This is a great use for leftover steak.
Cooked Ground Pork – add in the last 1-2 minutes of cooking.
Halved Boiled Egg – soft, medium or hard boiled, it’s up to you. Add to your bowl of soup just before serving.
Poached Egg – poach the egg separately from the rest of the soup. Add to finished soup just before serving.
Shrimp – cooked shrimp can be added in the last 2-3 minutes. Thawed raw shrimp require 4-5 minutes at a slow boil.
Tofu – use extra firm tofu that has been cut into cubes. Add tofu in the last 3 minutes of cooking.
A Meximelt is a discontinued Taco Bell menu item. It was a soft flour tortilla filled with seasoned ground beef, lots of melted cheese and salsa. For our version we swap out the flour tortilla for corn and use low FODMAP Pico de Gallo to make gut-friendly cheesy goodness.
The Meximelt, now gone from the Taco Bell menu.
Meximelts are meant to be extra cheesy, almost like a TexMex grilled cheese. You can use a Mexican cheese blend or you can try half cheddar and half Monterey Jack cheese. If you tolerate pepper Jack cheese, that could work as well.
According to Monash, up 3 corn tortillas are tolerated by most people on the low FODMAP diet. Supermarket chili powder often contains garlic and onion. Look for chili powder without garlic and onion online. Some ethic brands of chili powder are also free of those ingredients. If you can’t find it, replace with more paprika.
Heat a cast iron skillet over medium-high heat. Add the ground beef and 2 tbsp water. Cook the beef, stirring and breaking up the meat, for 5-6 minutes. Pour off excess fat and water. Stir in garlic-infused olive oil and cook for another minute.
Add the chili powder, cumin, paprika, coriander, pepper, oregano, salt, cornstarch and scallions. Stir until well combined. Add the water and broth concentrate, stir, bring to a simmer and cook uncovered until thickened, about 4-5 minutes.
Ingredients: Pico de Gallo
1 cup tomatoes, finely chopped
1/2 cup bell pepper, finely chopped
1/2 cup scallions, sliced (green parts only, about 4 scallions)
1/4 cup fresh cilantro, chopped
juice of half a lime (about 2 tbsp)
1/4 tsp sea salt
1/4 tsp black pepper
Instructions: Pico de Gallo
Combine all ingredients in a mixing bowl and mix well. It can be served right away, but for best flavor refrigerate for at least an hour.
Ingredients: Assembly and Cooking
16 oz shredded Mexican cheese blend
10-12 corn tortillas
prepared Salsa Cruda (see above)
prepared Seasoned Ground Beef (see above)
Instructions: Assembly and Cooking
For each Meximelt: Place a slightly damp paper towel on a plate and lay a tortilla on it. Add shredded cheese to just half the tortilla in a half moon shape. Top with 1-2 tablespoons of seasoned beef, spreading it evenly over the cheese. Add a spoonful of salsa cruda. Fold the empty half of the tortilla over.
Wrap the paper towel around the filled tortilla. Microwave for 1 minute or until melted. Serve.
Alternate cooking method: Heat oven or toaster oven to 425. Move rack to the highest position. Place unfolded Meximelt on a lined baking tray and bake 3-4 minutes or all the cheese is melted. Do not overcook. Remove from oven and fold in half. Serve.
Most of my experience making mashed potatoes has been preparing them for holiday dinners. They’re a big favorite so I usually make a lot at a time. It occurred to me recently, however, that I wasn’t sure if I knew how to make a small batch.
You can certainly use this recipe to make as many servings as you like of course; in that case this recipe will help you more accurately plan how much to make. But I developed this recipe with a time- and effort-saving trick for smaller dinners and smaller appetites. (Don’t worry it works on big recipes too.) This recipe features a unique step involving a baking rack. If you don’t have one a sieve, colander or other food safe wire rack could work.
Up to 2 cups of potato should be tolerated by most people following the low FODMAP diet, but a typical single serving of mashed potatoes is around a half cup.
Low FODMAP Easy Mashed Potatoes for 2
Makes 2 servings.
Ingredients
1 pound russet potatoes, unpeeled and cut in half (2 large potatoes)
1/2 cup (4 ounces) unsalted butter, softened and cut into 8 tablespoons
Add halved potatoes to a large pot then pour over enough water to cover potatoes by 1″. Add 1 tsp sea salt. Bring water to a boil over high heat, then reduce heat to medium and cook at rapid simmer until potatoes are easily pierced with a paring knife or fork – about 10-20 minutes. Drain. Let cool until able to be handled comfortably – 5-10 minutes.
Arrange a clean baking rack over a large mixing bowl. One at a time place the potatoes cut side down on the rack and gently press so the flesh falls into the bowl but not the skin. Discard the skins or save for another use.
Mash potatoes by hand with a potato ricer or beat on the lowest speed possible with a mixer.
Add the butter, milk, garlic infused oil and 1/8 tsp salt. Mash/beat until smooth. Taste and adjust seasonings as necessary. Serve warm.
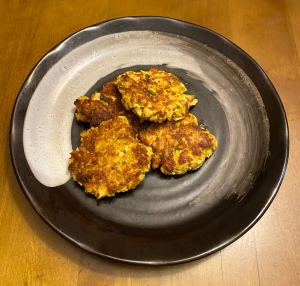
There’s no denying the pleasure of a simply prepared salmon cake. A nice fish cake with light bit of crust and a moist interior can be very satisfying. However the addition of Indian spices can elevate a simple fish cake into a culinary delight. These golden-toned salmon cakes are packed with flavor. Serve them as a main course or as an appetizer.
This recipe was developed with canned salmon in mind. Be aware that some types of canned salmon contain skin and bones. They are soft and edible but some people dislike the texture. If you prefer no skin or bones, be sure to read the packaging carefully. Look for the labels ‘boneless’ or ‘deboned’. You can of course use any leftover salmon fillets you may have on hand. The rest of the ingredients are usually found around most kitchens, making this an ideal ‘pantry meal’. The resulting salmon cakes are light and moist. They’re great on their own, but some folks prefer theirs with a bit of sauce.
Low FODMAP Indian-Spiced Salmon Cakes
Makes 8 small cakes or 2-3 servings.
Ingredients
10 oz cooked salmon (2 5 oz cans)
6 tbsp gluten-free panko
2 tbsp real mayonnaise (Best Foods/Hellmans recommended)
1 tsp Dijon mustard
1/8 tsp of Worcestershire sauce
2 tbsp finely chopped scallions (green parts only)
4 tbsp fresh cilantro, chopped
1/2 tsp turmeric
1/2 tsp cumin
1/2 tsp coriander
1/4 tsp low FODMAP chili powder (if tolerated)
1/4 tsp ground ginger
1/4 tsp black pepper
pinch sea salt
1 egg, beaten
1 tablespoon avocado oil (or other neutral oil)
lemon wedges for serving (optional)
Instructions
Combine the panko, mayonnaise, mustard, Worcestershire sauce, scallions, cilantro, spices, salt, and pepper in a mixing bowl. Drain the salmon well and gently stir in, leaving some large chunks of fish. Add enough egg to be able to form patties that stick together and mix until even. If it becomes too runny, add a little more panko.
Divide the salmon mixture in half, then repeat 2 more times so that there are 8 equal portions. Form each portion into a small cake about an inch tall.
Heat a nonstick or cast-iron pan over medium heat. Add the avocado oil. When hot, add the cakes to the pan and cook until golden brown, about 2 minutes per side. Do not overcook.
Serve hot, with or without sauce, accompanied by lemon wedges.
Troubleshooting
Having trouble with cakes that don’t hold together? Let’s figure out why.
Too chunky – it’s great to leave larger chunks of fish for texture, but there must be enough fish mashed with the panko and eggs to hold together. Try leaving fewer chunks.
Too dry – there must be the right amount of beaten egg in order for the mixture to hold together. Add a little bit of egg at a time, mixing well, until you can form a patty.
Too wet – sometimes there’s too much egg and it becomes too wet to hold shape. In this case add small amounts of panko until the mixture becomes sticky enough to hold together.
Don’t overdo it – if you wind up adding a lot of egg and panko, this can cause the resulting fish cakes to become dense and heavy. Use a light touch when adding egg or panko.
Across the Rio Grande from Eagle Pass, Texas lies the Mexican city of Piedras Negras, Coahuila. This bustling binational metropolitan area sees lots of cross-border traffic, just as it has for over a century. It was such a cross-border trip, in fact, that led to the development of a much-beloved snack, nachos.
In 1941 American patrons of the Victory Club restaurant in Piedras Negras requested a new and different snack. The maitre d’, Ignacio “Nacho” Anaya, returned with a dish of fried tortilla triangles topped with melted cheese and sliced jalapeños. The snack was extremely well received and was quickly dubbed ‘Nacho’s Special’. Nachos quickly became very popular at the Victory Club and eventually throughout the region and beyond.
When I am making nachos, I tend to try to use up whatever produce I have on hand. Usually I make my nachos vegetarian but on occasion I’ll top them with shredded chicken or low FODMAP TexMex seasoned ground beef. It really depends on my mood and how much energy I have. As with many low FODMAP dishes, take care not to exceed recommended portion size so that it is more easily tolerated.
Makes 1 serving.
Ingredients
16-20 gluten free corn tortilla chips
2-3 cherry tomatoes, chopped
2-3 black olives, chopped
1/4 cup or less yellow or orange bell pepper, chopped
1-2 scallions, chopped green parts only
1/4 cup shredded Mexican cheese blend (up to 1.4 oz)
Preheat oven or toaster over to 425F. Move the oven rack to the highest position. Line a baking sheet with parchment or aluminum foil.
Arrange tortilla chips in a single but slightly overlapping layer on the baking sheet. Evenly distribute as much shredded cheese as you like over the tortilla chips. Try not to make any deep piles of cheese or it won’t melt properly.
Bake the chips until all the cheese has just melted and the chips are just starting to brown. Remove from oven. Carefully slide the parchment or foil off the baking sheet onto a plate.
Top nachos with tomatoes, olives, scallions and bell pepper as you like. Garnish with cilantro. Serve immediately while still hot and the cheese is melted.
To the best of my knowledge Old Bay seasoning is low in FODMAPs. However many of us do not handle capsaicin well and Old Bay contains lots of it. If this is the case for you, you can try making your own version with little or no pepper components (paprika, cayenne, red pepper flakes). Old Bay is also very salty. You can reduce the amount of salt if you prefer.
It’s likely you’ll need to grind your own bay leaf powder. About 15-20 bay leaves will make what’s needed. Use a spice mill or a mortar and pestle. If using a mortar and pestle, break the leaves up into very small bits and grind with a pinch of coarse salt. It’s the most important flavor so make sure you prepare the full amount. It’s not so important to use every spice that follows if you can’t find it or don’t wish to purchase a large amount. Anything in ⅛ teaspoon range could be left out as necessary. Just use as many as you have on hand. Even pumpkin spice blend could stand in for a few flavors if that’s what you have.
What can you do with Old Bay? Use it for crab or shrimp boils. I like adding a bit to fish cakes or crab cakes. It can be nice in soups as well. Some people like it on fries. Other folks add it to Crispy Salt & Pepper Shrimp seasonings. It’s really up to you. Use it in American style dishes whenever you need a bit more flavor.
Modifiable Old Bay Spice Blend
Makes ~5 tablespoons.
Ingredients
1 tablespoon ground dried bay leaves
1 tbsp sea salt
1 tablespoon plus 1 teaspoon ground celery seeds
2 teaspoons dry mustard powder
2 teaspoons ground paprika (regular or smoked both ok)
1 teaspoon ground black pepper
1 teaspoon ground white pepper
¼ teaspoon ground nutmeg
⅛ teaspoon ground cinnamon
⅛ teaspoon ground mace
⅛ teaspoon ground ginger
⅛ teaspoon ground cloves
⅛ teaspoon ground cardamom
⅛ teaspoon ground allspice
⅛ teaspoon cayenne pepper
crushed red pepper flakes to taste
Instructions
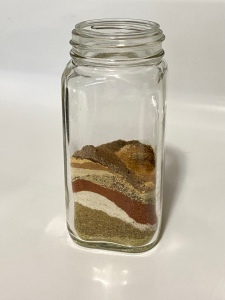
Using a small funnel or a folded sheet of clean, sturdy paper, add all ingredients to a small jar with a tight-fitting lid. (Old spice jars are ideal.)
Close the lid and shake vigorously until well-mixed.
Kebat is Burmese dish of of usually chicken or steak and tomatoes prepared in a light curry sauce and served with rice. Restaurant versions of kebat can be quite complex featuring a vast array of herbs and spices, while homestyle kebat keeps it simple. Burmese food is not very well known in the United States unfortunately. It’s a shame because there’s so much to love about it. The flavors of Southeast Asia and the Indian subcontinent meld in Myanmar to create a uniquely delicious cuisine. This easy home-style dish is an excellent introduction to it.
The most authentic curry to use for this dish is Madras curry. Madras curry is on the hotter side of curry powders. If you tolerate chilis and spicy food, find a low FODMAP version that does not contain onion or garlic and use that. If, like me, you don’t do well with capsaicin, you can make your own low FODMAP Curry Powder and customize it to your liking. It’s just as delicious. Really though, any curry powder (Malaysian, Indian, Japanese, etc) you can tolerate will taste great.
Combine curry powder, fish sauce, 1 tbsp garlic infused oil and salt in a mixing bowl. Add the chicken and mix until evenly coated. Let the chicken marinate at room temperature while you prepare the other ingredients.
Chop the white ends off the scallions and discard. Take the top 1/3 of the useable portion of the scallions and chop them. Cut the remaining sturdier lower portions into 2” lengths.
Heat a cast iron skillet over medium-high heat. Add 1 tbsp garlic-infused olive oil. When it is hot, add the chicken. Cook for about 5 minutes. Add the water and the chopped scallions. Continue to cook until the chicken is cooked through and the water has evaporated, about 4 minutes more.
Add the long-cut scallions and cook for another minute. Stir in the tomatoes and cook for about 1 minute more. The scallions should be wilted with a bit of crunch. The tomatoes should still be solid, not squishy. Do not overcook.
Remove from heat. Dish out portions. Top each with fresh cilantro. Serve with hot jasmine rice, lime wedges on the side.
Commercial pumpkin pie spice blends are generally low FODMAP. That means it should be easily tolerated by those following the low FODMAP diet. If it’s easier you to buy pumpkin pie spice, by all means do so. I’ve found it to be pretty fun and easy to make my own which is why I’m sharing this basic recipe.
As with all the recipes I share, feel free to customize it and make it your own. I happened to have both Cassia (Saigon) cinnamon and Ceylon cinnamon (true cinnamon) on hand so I used both types. The flavor was fabulous, but by no means is it necessary to use both kinds to get great results. Use whatever you’ve got in your cupboard.
What can you do with your pumpkin spice blend? Naturally it’s ideal for making pumpkin pie but it’s also great in coffee/lattes, tea, cocktails, mulled wine, smoothies, oatmeal, baked goods, popcorn, chips, or even sprinkled over roasted carrots. Some folks like to dust bacon with a little pumpkin spice. Pumpkin spice is comprised completely of green-light ingredients according to Monash so get creative and add a some flavor without adding FODMAPs.
Pumpkin Pie Spice Blend
Makes
Ingredients
1.5 tbsp ground cinnamon
1 tsp ground ginger
3/4 tsp ground nutmeg
1/2 tsp ground cloves
1/2 tsp ground allspice
1 grind black pepper
Instructions
Using a small funnel or a folded sheet of clean, sturdy paper, add all ingredients to a small jar with a tight-fitting lid. (Old spice jars are ideal.)
Close the lid and shake vigorously until well-mixed.
Make your own single or double serving pumpkin pie quickly in the microwave. This yummy crustless treat can be ready in just 15 minutes. Generally microwave pies aren’t the prettiest baked goods due to the cooking method, but they taste great! I used pumpkin pie spice I made myself (recipe follows pie recipe) since I had an excess of the right spices, but store bought pumpkin spice blends work just as well.
Usually a recipe like this one requires heavy whipping cream. Whipping cream is surprisingly a low FODMAP food due to its high fat content and low lactose content. In fact up to half a cup of real whipped cream should be tolerated by most. However I personally don’t like buying ingredients for one recipe that I won’t use up. I decided to employ an old baking trick in which you can substitute milk plus butter for cream since I often have lactose free milk on hand. (If you have heavy whipping cream on hand and would like to use it, omit the butter and use 1/4 cup of heavy cream instead of lactose free milk. )
This recipe makes a fairly large single serving. It can easily be split into two servings. My recommendation is to use wide, shallow microwave-safe bowls so it cooks evenly. Mine took a little longer than 2 minutes for the center to set. All microwaves are a little different so your pie may need more or less time.
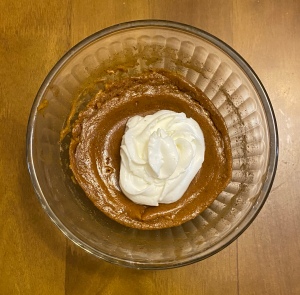
Pumpkin pie with a dollop of whipped cream. It ain’t pretty but it sure is yummy!
Low FODMAP Personal Pumpkin Pie
Makes 1 large serving or 2 average servings.
Ingredients
1/ 3 cup canned pumpkin purée
1 egg
1/3 cup cane sugar
1/4 cup lactose free whole milk
4 tsp unsalted butter, melted
pumpkin pie spice to taste (approx. 1 tablespoon)
1 tsp vanilla extract
Pinch of salt
Instructions
Add all ingredients to a bowl and whisk together until smooth.
Pour mixture into 1 or 2 microwave-safe bowls. Microwave for approximately 2 minutes, checking it every 30 seconds.
You remembered the pumpkin but forgot the Pumpkin Spice? I’ve got you covered. This recipe should make enough for this recipe twice over. I happened to have both Cassia (Saigon) cinnamon and Ceylon cinnamon (true cinnamon) on hand so I used both types. The flavor was fabulous, but by no means is it necessary to use both kinds to get great results. Use whatever you’ve got in your cupboard.


You must be logged in to post a comment.